10 Professional Baking Tools I Use at Home

10 Professional Baking Tools I Use at Home

This tools can make your time in the kitchen quicker, cleaner, and easier.

We may earn a commission from links on this page.
Start Slideshow
Image for article titled 10 Professional Baking Tools I Use at Home
Photo: mattburchell (Shutterstock)

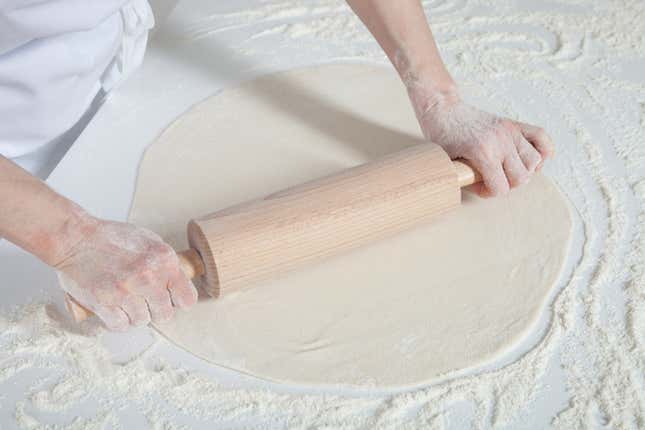
In a professional bakery kitchen, you’ll see plenty of multi-purpose tools in action, and cabinets full of gadgets that are equally believable as scalp massagers or torture devices. Although there’s a time and use for all of those utensils, in my home kitchen I ditch the docking roller for a fork. You do not, however, need years of bakery experience to figure out which baking tools you need at home, and what can be left to the pros. I made a list of 10 professional, non-electronic instruments and implements that you’ll use time and again.

Advertisement
Previous Slide
Next Slide

2 / 12

Grid style wire racks

Grid style wire racks

Image for article titled 10 Professional Baking Tools I Use at Home
Photo: DiAnna Paulk (Shutterstock)

There are plenty of baked goods that spend more time cooling than they do in the oven. Give them an appropriate place to cool-off. A large, criss-cross patterned wire rack is possibly one of my most used tools in my kitchen, second to pots and pans. Yes, I use it for cooling cakes, but also for glazing desserts in ganache or thin icings, so the excess topping can run below. It’s also great for resting hot grilled cheese sandwiches so they don’t get soggy on the bottom, baking bacon, or roasting other meats to keep them above the level of their rendering fat.

The grid pattern is important, as is the large rectangular size. Single direction wire racks are okay, but smaller items can fall through, and soft cookies can become misshapen or break if they fall halfway off a wire. Rectangular wire racks are often sold in sizes that fit perfectly into rimmed baking sheets, so measure your baking sheets before purchasing. These two tools can work in tandem to cool large sheet cakes, or catch wayward crumbs. I often end up needing two racks to flip a hot cake out of its pan, so save your fingertips and buy two racks.

Advertisement
Previous Slide
Next Slide

3 / 12

Cardboard cake rounds

Cardboard cake rounds

Image for article titled 10 Professional Baking Tools I Use at Home
Photo: Ugorenkov Aleksandr (Shutterstock)

Before working in a bakery, I’d fix a cake on a plate and get annoyed when it wouldn’t sit flat. Most dinner plates are slightly concave, and this can crack delicate desserts like tarts and cheesecakes. A cardboard cake round provides a sturdy, flat surface. It’s a better surface for your knives to cut on, and it allows you to move the dessert around freely, rather than clinging to the first thing you set it on.

If you’re packing the item in a box to bring to a party, the cake round provides protection by sticking out about half an inch from the bottom. If you hit a bump, the cake board knocks into the side of the box, not the cute frosting flowers that you put on the side. You can also use cake rounds to trace circles of parchment, or measure a top or bottom for a pie crust. If it’s large enough, you can use a cake round for storage. Sit a cake round on top of a flat pie in the fridge and stack another pie on top to capitalize on vertical space. You can buy decorative rounds like the gold one in the photo, but I usually buy the plain, matte, white ones because they’re inexpensive in bulk.

Advertisement
Previous Slide
Next Slide

4 / 12

Offset spatulas

Offset spatulas

Image for article titled 10 Professional Baking Tools I Use at Home
Photo: UfaBizPhoto (Shutterstock)

From peanut butter on toast to large swathes of frosting on sheet cakes, you can make quick work of it with the right tool. To smear pastes, frostings, or sauces evenly and thinly, use an offset spatula. They come in a variety of sizes, and I find that I use a mini offset and a medium offset the most at home. The thing that sets this spatula apart from a straight cake spatula is the bend in the blade by the handle. This notch allows you to reach down into rimmed pans without angling the tool. You’ll be able to spread the flattest layer of béchamel into the lasagna pan, or a thin layer of jam into a tart shell, no sweat. For spreading out sauces or frostings on items with no pan or rim to worry about, the offset keeps your knuckles above the level of the food, and out of the way.

Advertisement
Previous Slide
Next Slide

5 / 12

Wooden rolling pin with spinning handles

Wooden rolling pin with spinning handles

Image for article titled 10 Professional Baking Tools I Use at Home
Photo: Maryna Pleshkun (Shutterstock)

I can’t make a baking tools list without including the greatest bakery workhorse: the rolling pin. There are many types of rolling pins and they all serve different purposes. My favorite kind is an unfinished wooden pin with free spinning handles. Unfinished wood is slightly rough, not shiny and slick like finished wood. This rough finish keeps sticky, buttery doughs from sticking to the pin, but lets flour cling on tight.

Some pins do not have handles. I prefer handles because it keeps your knuckles from bumping into the dough and it’s a more natural position to hold the pin with control. The free spinning handles make the work faster, and if you’re rolling a lot of dough consistently, your wrists will thank you. Use a rolling pin to roll out pie crust, cookie dough, dumpling shells, or tenderize meats or butter via smashing.

Advertisement
Previous Slide
Next Slide

6 / 12

Pizza cutter

Pizza cutter

Image for article titled 10 Professional Baking Tools I Use at Home
Photo: shutterdandan (Shutterstock)

The name would have you think it’s only for slicing a hot Sicilian, but a pizza cutter is a rotary wonder blade. You’ve seen how fast they can dice up a 24-inch pie, think about the speed it’ll bring to cutting any other flat dough. This circular knife allows you to cut lengths of dough quickly, with precision, and with flexibility of direction. 

I use a pizza cutter for cutting homemade pastry dough into the necessary shapes, long strips of puff pastry for cheese straws, and brownies or bars that are about an inch thick. Besides being faster than a knife in these cases, the circular blade keeps sticky dough from ruining your day. Since there is only one small point of contact at any point during cutting, buttery doughs, or pastries that you filled with jam or chocolate don’t tend to stick. If you’re cutting rather thin strips of dough and you’re worried it’ll wrap around the wheel, hold down the end closest to you to keep it from pulling up.

Advertisement
Previous Slide
Next Slide

7 / 12

Piping bags

Piping bags

Image for article titled 10 Professional Baking Tools I Use at Home
Photo: Riana Ambarsari (Shutterstock)

Disposable and reusable piping bags are excellent helpers in the kitchen. They range in size from small piping bags, which are great for precision filling or writing, to large piping bags, which are ideal for bulk work. Piping bags are the best tool for dividing large quantities of batter, sauce, fillings, or doughs with speed and precision. Spooning sauces or fillings can take a while and make a mess. The conical shape of a piping bag helps keep the food flowing to an exact spot, and it allows you to cut off the flow in a clean manner. Fill deviled eggs, pipe out 100 mini cookies, prepare a batch of 36 cupcakes (mess-free), or pipe sausage filling into casing. You can use piping bags with differently shaped tips for patterns or shapes, or without a tip for a basic, round shape.

Advertisement
Previous Slide
Next Slide

8 / 12

Parchment paper

Parchment paper

Image for article titled 10 Professional Baking Tools I Use at Home
Photo: Maryia_K (Shutterstock)

Parchment paper is the single most versatile liner in the kitchen. It’s a non-stick, heat-resistant, food safe paper. For sheet trays and cake pans, nothing is more dependable, but you can use it for baking fish en papillote, or to line a steamer for delicate steamed buns. Beyond lining, use parchment as a non-stick surface for rolling out pastry dough, wind up a piece for a quick cornet, tear small squares and layer it between tender crêpes to keep them from sticking, or wrap up a few sandwiches for a picnic.

Advertisement
Previous Slide
Next Slide

9 / 12

Seasoned baking sheets

Seasoned baking sheets

Image for article titled 10 Professional Baking Tools I Use at Home
Photo: Irina Mos (Shutterstock)

The look of shiny, new sheet pans is by far more glamorous than the blotchy, brown, seasoned one, but that’s about all new sheet pans have going for them. Seasoned baking sheets are no longer reflective, and their darkened color distributes heat more quickly and promotes browning. More browning means more flavor, whether it’s cakes or cornish hen. The discolored finish also aids in making the pan more non-stick. Still working on the patina for your baking sheets? Much like with cast iron, oil is your friend. Oil it thoroughly, toss on seasoned veggies and meats and roast away. Clean the pan lightly, but don’t stress about the discoloration or blotches that can’t be removed. That stuff is the beginning of your seasoning.

Advertisement
Previous Slide
Next Slide

10 / 12

Wet and dry pastry brushes

Wet and dry pastry brushes

Image for article titled 10 Professional Baking Tools I Use at Home
Photo: Yuriy Golub (Shutterstock)

I love my pastry brushes. Time and again, they’ve made my baking and cooking quick and easy. By the way, I have three. They’re not actually different, but I designate them for different uses. One is for wet ingredients, and two are for dry ingredients (one is small for precision dusting, and the other is wide). Pastry brushes are paint brushes that you use for food, making them ideal for anything you’d use like paint. Egg wash pies, pastries, and doughs. Swipe a simple syrup onto cake layers in two or three strokes. Use a dry pastry brush for delicately brushing away excess flour. A thick layer of flour is needed to keep doughs from sticking to the counter while shaping, but if left on, the flour stays on the product even after baking, and you’ll end up chomping a mouthful of flour. Brush the excess from pizza dough, pastries, and rolled cookies. Technically, one brush is enough, and you should thoroughly wash and dry them after their work is finished regardless.

Advertisement
Previous Slide
Next Slide

11 / 12

Rubber spatulas

Rubber spatulas

Image for article titled 10 Professional Baking Tools I Use at Home
Photo: LightField Studios (Shutterstock)

Maybe it was my upbringing, but I become physically uncomfortable when anything is left behind in a mixing bowl. If it’s usable, I want it out. The rubber spatula is flexible, comes in a variety of stiffnesses, and silicone rubber is non-stick. You can scrape down a bowl of marshmallow, brownie batter, or oil-based salad dressing and the rubber spatula will hug every curve leaving a deceptively clean bowl behind. Silicone spatulas are heat resistant, many up to 500°F, with 12-inch handles, making them as useful for high temperature sugar work as they are for mixing up a boxed cake mix.

Advertisement